A Bicycle cassette tool is a small workshop essential for removing or fitting the cassette on a rear wheel. It engages the cassette lockring, allowing a mechanic to loosen or tighten it with a compatible wrench. The tool does not remove the chain or freewheel by itself; a chain whip is usually needed to hold the cassette still while loosening the lockring. The exact tool depends on the hub and lockring design, so checking the component’s specifications matters.
The need for reliable bicycle maintenance is easy to underestimate. PeopleForBikes’ 2023 Bicycle Industry Report estimated that 112 million Americans rode a bicycle in 2022. That figure describes participation, not cassette repairs, but it shows how many riders may eventually face routine drivetrain service. Shimano dealer service documentation likewise emphasizes using the correct tools and following component-specific instructions. Small details matter. A poorly seated tool can slip, damage the lockring, or leave a rider with a loose cassette. The job looks simple, but it rewards patience. Before turning the wrench, confirm the tool is fully engaged and the wheel is secured. This guide explains what a Bicycle cassette tool is used for, how it works, and what to check before choosing one. I would not assume every cassette uses the same fitting; that shortcut can lead to the wrong purchase.
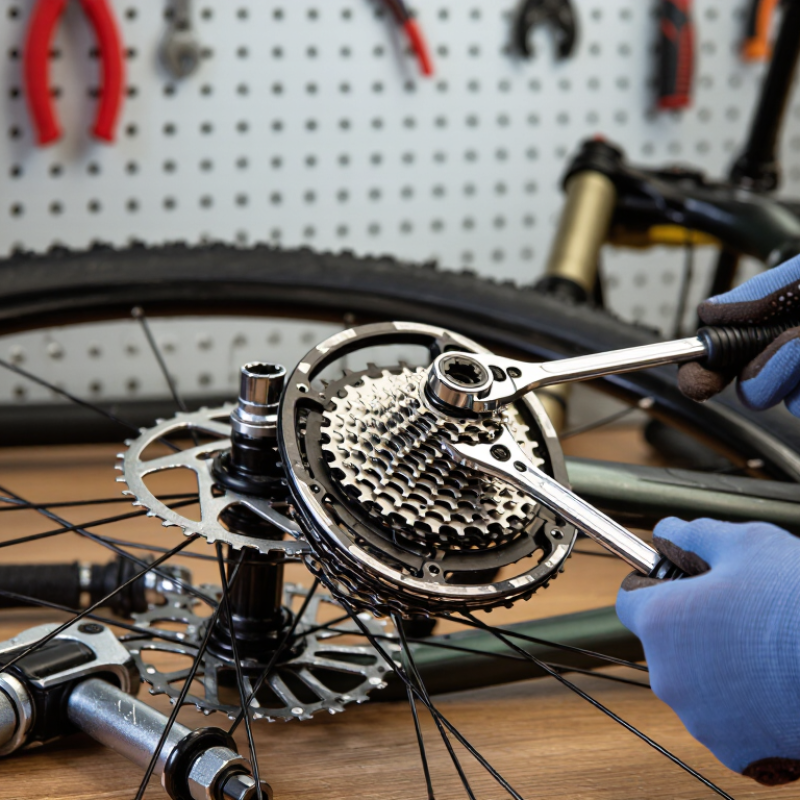
A bicycle cassette tool is a shaped socket that engages the splines on a cassette’s lockring. The lockring holds the cassette sprockets on the rear hub. The tool lets a mechanic loosen or tighten that ring without gripping the small sprockets by hand. It is commonly made of hardened metal and may have a center guide pin to keep it aligned with the axle.
The name can be confusing. People sometimes use “cassette tool” to describe the lockring socket, or a kit containing that socket and a chain whip. They do different jobs: the socket turns the lockring, while the chain whip holds the cassette still during removal. Small details matter. Lockring shapes and axle clearances can vary, so check that the tool matches the wheel before applying force. Seat it fully and keep it straight; a slipping socket can round the splines. A wrench or torque wrench may drive the socket, depending on the task. Tighten to the wheel or component maker’s specified torque. I still find the naming less clear than it should be, but understanding the two tools prevents a lot of confusion.
A bicycle cassette tool fits into the lockring’s shaped recess, where its teeth or splines match the grooves. That connection lets a wrench turn the lockring without slipping across its face. Match the tool to the lockring before applying force; some designs differ. A tool that looks close may not engage deeply enough.
Look closely. The tool should sit squarely, with its splines fully seated. On a workstand, a slight wiggle can help confirm the fit. If the tool rocks or catches only at the edges, stop and check compatibility. It can feel seated before it is. During removal, a chain whip holds the cassette sprockets steady while the tool turns the lockring counterclockwise. The cassette would otherwise rotate with it. A long wrench adds leverage, so controlled pressure matters more than a sudden pull. On installation, the tool turns the lockring to the specified torque, usually checked with a torque wrench. I still find it easy to rush this step; a crooked start can damage the threads. Keep the tool aligned, and inspect the lockring and cassette splines for wear.
A cassette tool removes and installs the lockring that holds a rear cassette on the hub. The common type is a splined lockring socket, often used with a wrench or ratchet. Check the spline pattern and axle opening before buying; similar-looking tools may not fit every cassette. A snug fit matters. A loose tool can slip and damage the lockring.
A chain whip is often paired with the socket. Its chain wraps around a sprocket to stop the cassette rotating while you loosen the lockring. For installation, the socket turns the lockring while the wheel stays steady. Some sockets have a guide pin or a built-in handle, which can make alignment easier. A freewheel remover looks similar, but serves a different hub system, so check the component type before applying force.
Tool choice matters to everyday riders. PeopleForBikes’ 2023 U.S. Bicycling Participation Report estimated that 112 million Americans rode a bicycle in 2022. That is broad participation, not a measure of cassette repairs, but it shows why basic maintenance skills are useful. When reinstalling a cassette, use the torque specified for its component; guessing can leave the lockring too loose or overtightened. The distinction between cassette and freewheel tools can still be confusing. That’s worth checking twice.
| Tool Type | Main Use | How It Works | Useful Notes |
|---|---|---|---|
| Splined cassette lockring tool | Loosens or tightens the lockring that holds a cassette on a compatible freehub body. | Its shaped teeth engage the lockring; a wrench or ratchet turns the tool. | Check the tool profile against the lockring. Some designs also have a guide pin to help keep the tool aligned. |
| Chain whip | Holds the cassette sprockets still while the lockring is loosened. | A short length of chain engages a sprocket and counters the cassette’s rotation. | Typically used with a cassette lockring tool; it is not a substitute for that tool. |
| Cassette pliers | Holds cassette sprockets against rotation during lockring removal or installation. | Toothed jaws grip sprockets, performing a similar counter-holding job to a chain whip. | Use the tool on a sprocket area its jaws can grip securely, following the tool’s instructions. |
| Lockring tool with a guide pin | Helps keep the lockring tool seated while working on a compatible wheel or hub. | The pin locates in the axle opening while the splined end engages the lockring. | The pin must fit the axle arrangement; some thru-axle setups may require a different tool design. |
| External-tooth lockring tool | Installs or removes certain lockrings with external notches, including some disc-rotor lockrings. | Its shaped head fits the lockring’s external features and is turned with a suitable wrench. | Not every cassette uses this style. Confirm the lockring interface before choosing a tool. |
| Freewheel remover (different tool) | Removes a threaded freewheel unit from a hub; it is not the standard tool for a cassette lockring. | Its matching profile engages the freewheel body so the unit can be unscrewed from the hub. | A cassette sits on a freehub body and is retained by a lockring; identify the drivetrain type before starting. |
Basic cassette removal: Use a compatible cassette lockring tool together with a chain whip or cassette pliers to prevent the sprockets from turning. Check the tool fit and follow the component maker’s torque guidance when reinstalling.
A bicycle cassette tool engages the splined lockring that holds the cassette on the rear wheel. To remove it, take the wheel off and check that the tool matches the lockring. Seat it fully, then fit a chain whip around a sprocket to stop the cassette turning. Turn the lockring counterclockwise with a wrench. Keep the tool straight; a crooked fit can damage the splines. The lockring may feel tight at first.
For installation, slide the sprockets onto the freehub in their correct order, matching the narrow spline. Add any required spacer, then thread the lockring by hand to avoid cross-threading. Tighten it with the cassette tool to the torque specified for that component. A torque wrench gives a more reliable result than guessing. Spin the cassette and check for wobble before reinstalling the wheel. It is easy to rush this check; I would not skip it.
Tips: Wear gloves, and keep fingers clear of the chain whip. If the tool slips or the lockring looks damaged, stop and inspect the fit. After installation, check that the wheel is secure and the gears shift smoothly. A brief test ride can reveal a problem, but it cannot replace a careful inspection.
A bicycle cassette tool engages the lockring that holds the cassette on the rear hub. Choosing the right one starts with matching its splines to the lockring, not judging by appearance. Some designs need a center guide pin; others fit over the axle. Check your hub and tool dimensions before buying. A close fit is not good enough.
A cassette tool is often used with a chain whip to keep the sprockets from turning while the lockring is loosened. Confirm the tool sits fully in the splines before applying force. A slipping tool can round the lockring or injure your knuckles. It is tempting to choose the first tool that looks close; that guess can waste a repair. Also, do not confuse a cassette lockring tool with a freewheel remover. Worth checking.
After use, wipe off grease and grit, then inspect the splines for rounding, cracks, or rust. Store the tool dry, and replace it if it no longer seats firmly. Use a suitable wrench and follow the cassette maker’s torque specification when reinstalling. It is easy to rush this check; I would rather pause and confirm the fit twice.
It turns the lockring that holds the cassette sprockets on the rear hub. The tool fits into the lockring’s shaped grooves.
No. The cassette tool turns the lockring, while the chain whip holds the sprockets still during removal. Different jobs.
Match its splines to the lockring, then seat it squarely and fully. If it rocks or catches at the edges, stop and check compatibility.
The pin helps keep the tool aligned with the axle. Some designs need one; others fit over the axle without it.
Hold the cassette with a chain whip and turn the seated tool counterclockwise. Apply controlled pressure, not a sudden pull.
Follow the wheel or component maker’s specified torque. A torque wrench can help you reach it accurately. Don’t guess.
Not necessarily. A freewheel remover is different, so check the part and tool match before applying force. I still double-check this.
Wipe away grease and grit, then inspect for rounded splines, cracks, or rust. Store it dry, and replace it if it no longer seats firmly.
A Bicycle cassette tool is designed to engage the lockring that secures a cassette to a bicycle’s rear hub. By fitting into the lockring’s grooves or splines, the tool helps hold it securely while a compatible wrench applies turning force. Different tool designs suit different lockring interfaces and working conditions, so matching the tool to the cassette is essential.
To remove a cassette, first secure the wheel and use a chain whip to keep the cogs from turning as you loosen the lockring. For installation, place the cassette in the correct order and tighten the lockring to the recommended specification. Choose a tool with a precise fit and a sturdy construction, and keep its contact surfaces clean and undamaged. Careful handling helps prevent slipping, protects the lockring, and makes routine cassette maintenance safer and easier.