A pump can feel secure while the tire remains underinflated. That small uncertainty matters when a ride starts on wet pavement, rough gravel, or a crowded commute. The Auto-lock Presta valve head is designed to attach firmly to a Presta valve, helping reduce slipping and air loss during inflation. Still, “auto-lock” does not mean “fit and forget.” Correct attachment, pressure selection, and careful removal all matter.
PeopleForBikes’ 2024 U.S. Bicycling Participation Report estimated that 112 million Americans rode a bicycle in 2023. That broad participation makes reliable, understandable maintenance advice useful to everyday riders—not only racers. For technical context, this guide focuses on practical steps: identifying the valve, aligning the head, locking it in place, reading the gauge, and releasing it without bending the valve stem. Small details matter.
Josh Poertner, founder of SILCA and a specialist in bicycle tire technology, has emphasized matching tire pressure to the tire, rider, and riding surface. This is a paraphrase of his published guidance, not a verbatim quotation. It is also a useful reminder: a locking head cannot correct an unsuitable pressure or a damaged valve. The sections ahead explain how to use an Auto-lock Presta valve head in 2026, what to check before pumping, and which common mistakes deserve a second look. Real equipment varies. Check the pump maker’s instructions, and verify pressure with a dependable gauge before rolling out.
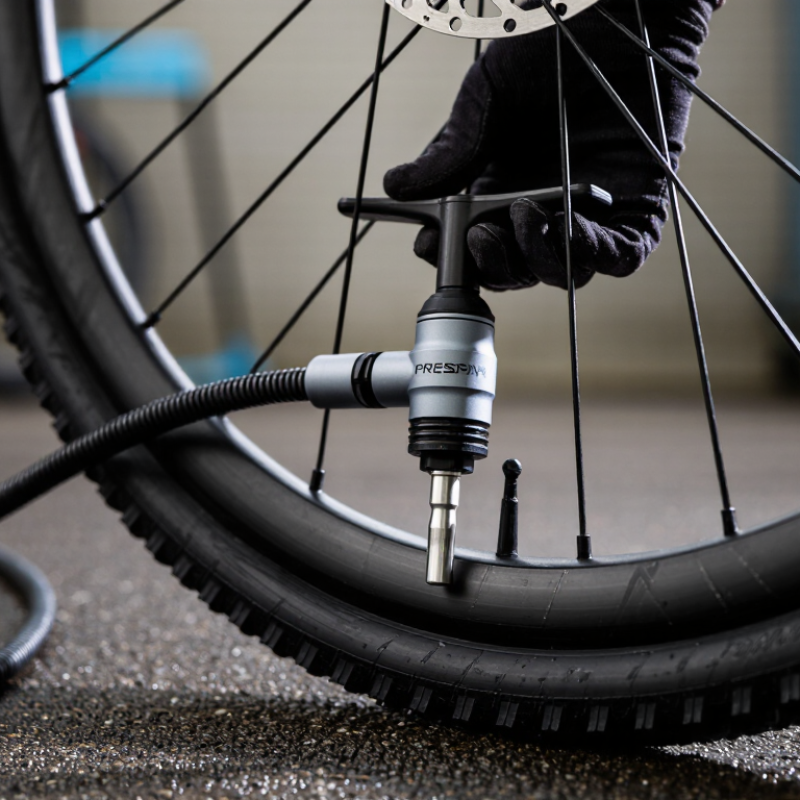
An auto-lock Presta head grips the valve when you push it on. Inside, a lever or sliding sleeve compresses a seal around the narrow stem. Air then passes through the valve core when you start pumping. The locking action helps prevent the head from slipping, but it does not open every Presta valve automatically. Some cores need their small top nut loosened first. You should feel firm contact, not force. That distinction matters.
ISO 4570 specifies dimensions for cycle valve stems. A Presta rim opening is commonly about 6 mm, compared with about 8 mm for a Schrader valve opening. Check the head’s compatibility before inflating; a loose fit can leak, while a crooked connection may bend the stem. Watch the gauge as you pump, and use the pressure range printed on the tire. The standard covers dimensions, not the locking head’s seal or accuracy, so inspect those in actual use.
Tips: Unscrew the Presta tip nut, press the head straight onto the stem, and engage its lock. Pump slowly at first. If air escapes, stop and reseat the head rather than pushing harder. Release the lock before pulling the head away. A little air loss can happen; repeated hissing deserves a closer check.
Check that the head supports Presta valves or uses an adapter. Compare its opening with the narrow valve tip. Don’t force a loose or mismatched head.
Look for bends, cracks, or looseness where the valve meets the rim. If the stem looks damaged, stop and have it inspected. Keep it gentle.
Remove the cap and turn the small nut counterclockwise until it opens. Press it briefly to check airflow. Leave the nut attached.
Hold the wheel steady and place the head straight onto the valve. Follow the head’s locking action without twisting the stem. If air escapes, release and reseat it.
Check that enough valve stem extends beyond the rim for the pump head to grip. I sometimes double-check this; it is easy to overlook.
Switch off the pump, release the locking mechanism, and pull the head straight away. Avoid sharp rocking. A brief hiss can be normal.
Close the valve tip clockwise and listen near it. If needed, apply a little soapy water around the tip and base. Growing bubbles can indicate escaping air. Wipe the area dry afterward.
Check that the tip is fully closed and that the pump head has not loosened the valve core. Reattach the head squarely and inflate again only if needed. Don’t force it.
An Auto-lock Presta valve head is designed to connect securely to a Presta valve and make tire inflation straightforward. Before using it, check that the pump head is compatible with the valve and that the tire and valve are in good condition. Prepare the valve by removing its cap and loosening the small valve nut as needed, taking care not to bend or damage the stem.
Press the head onto the valve until it locks in place, then inflate the tire gradually while checking the pressure with a gauge. Stop when the tire reaches the pressure appropriate for its use, and avoid exceeding its recommended limit. To finish, release the locking mechanism and remove the head gently. Listen for escaping air and inspect the valve connection; if air continues to leak, check the valve and repeat the attachment process before riding.