A flat tire rarely happens at a convenient time. It may appear beside a wet roadside, under weak trail light, or minutes before an important ride. In those moments, a reliable Multi-tool tire lever can turn a frustrating repair into a controlled five-minute task. The best designs combine bead-lifting strength, compact storage, grip, and useful functions such as hex keys, chain tools, or valve-core accessories.
Calvin Jones, a respected bicycle mechanic and Park Tool educator, offers practical guidance: “A tire lever should lift the bead, not fight the rim.” That principle shapes this guide to the 7 Best Multi Tool Tire Levers for Bike Repair. Each option deserves attention for a different reason. Some slide smoothly under tight beads. Others add tools without becoming bulky. A few feel excellent in the hand but sacrifice pocket space. Small compromises matter.
Real workshop experience also reveals an uncomfortable truth: no lever suits every wheel, tire, or rider. A stiff gravel tire can defeat a beautiful design. A metal edge may save effort but risk scratching a rim. Plastic can protect the wheel, yet sometimes bends under pressure. We compare these details honestly, including weaknesses that product pages often ignore. Expect practical observations about leverage, durability, portability, and emergency use. A perfect tool probably does not exist. The smarter choice depends on your bicycle, tire system, repair habits, and tolerance for carrying one extra gram.
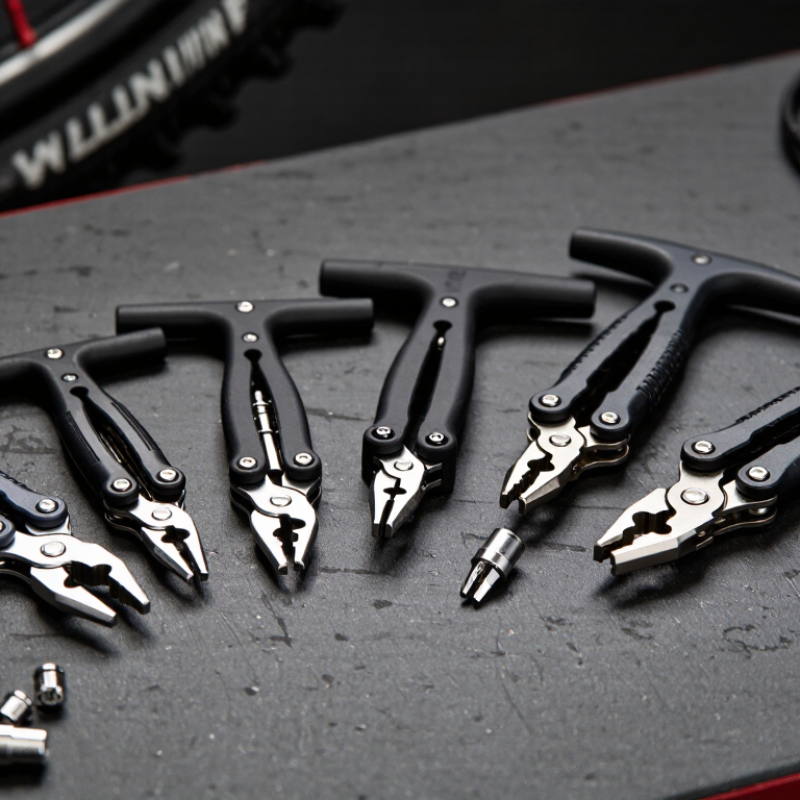
A useful multi-tool tire lever does more than lift a tire bead. During roadside repairs, I value a firm grip, smooth edges, and a shape that fits my hand. Sharp plastic edges can scratch a rim or pinch an inner tube. A strong lever should flex slightly, but not collapse under pressure.
The best designs combine practical functions without becoming bulky. A built-in spoke wrench, valve-core tool, or small hex key can solve common problems. However, extra features are only useful when they remain easy to access. I once carried a compact tool with several functions, but its crowded shape slowed every repair. That experience changed my priorities. Simple access matters more than a long feature list.
Tips: Test the lever at home before carrying it. Check its fit on your rim and tire combination. Practice removing a tight tire without forcing the lever. Keep a separate patch kit and spare tube, because a multi-tool tire lever cannot fix every failure. Clean grit from the tool after muddy rides. I still make mistakes when working in cold weather, especially with stiff tire beads. That is why reliable shape, visible markings, and a comfortable grip matter during real bike repairs.
A multi tool tire lever should do more than lift rubber from a rim. During roadside repairs, I compare its material, leverage, and grip before checking extra functions. A glass-filled nylon body usually feels lighter than metal. It also reduces the chance of scratching painted rims. The working edge should be thin enough to enter beneath a tight bead, but not sharp enough to cut the tire.
Pay attention to the handle length. A short lever saves space, yet it may demand more hand force on stiff commuter tires. Textured surfaces help when your fingers are cold or muddy. Some models include hex keys, spoke tools, or a valve-core slot. These additions are useful only when they remain easy to access. A crowded design can slow repairs. Test each function before carrying it.
Weight matters on long rides, but durability matters more after repeated use. Check whether the lever flexes smoothly without whitening, cracking, or permanently bending. I once chose the lightest option and regretted it beside a hard roadside shoulder. The tool worked, but its narrow grip hurt my palm. That experience changed my comparison method. I now test levers on both folding and wire-bead tires, then inspect the rim and lever for damage. Measurements help, although real hand comfort can still surprise you.
A multi-tool tire lever earns its place when one small body solves several roadside problems. In my repair kit, the basic lever handles tight tire beads without scraping the rim. A lever with hex keys suits saddle adjustments and loose bottle-cage bolts. Keep it for quick fixes. A spoke-wrench lever helps correct a gentle wheel wobble, but it cannot replace proper wheel tensioning. That distinction matters.
A lever with a valve-core tool is useful when a tubeless valve leaks or needs cleaning. The chain-hook version holds two chain ends together during a temporary repair. It saves dirty fingers. A lever with a flat screwdriver can adjust clamps, though its tip may damage soft screws. Use light pressure. Another design includes a small disc-brake spreader, which helps retract pads before wheel installation. I would not use it carelessly near hydraulic seals. The seventh option combines a patch-scraper surface with several hex sizes, making it practical for tube repairs and minor adjustments beside a wet trail. I once chose a compact model with too many functions and regretted it; its lever flexed under a stubborn bead. More functions are not always better. Check stiffness, rounded edges, grip texture, and tool fit before riding. A short test at home reveals weaknesses that a cold roadside repair will expose.
How to Use a Multi-Tool Tire Lever Safely and Effectively
A multi-tool tire lever can solve roadside punctures, but careless force can damage the rim or inner tube. NHTSA’s 2022 Traffic Safety Facts recorded 1,105 bicyclist deaths in the United States. That figure reinforces a simple point: control and equipment checks matter before riding away.
Move to a stable, visible location before removing the wheel. Release the brake if necessary, then deflate the tire completely. Check the lever for cracks, sharp edges, or a loose folding joint. Insert its rounded end under the bead, away from the valve. Lift only a short section. Slide the lever around the rim instead of twisting aggressively.
Keep fingers clear.
Use a second lever only when the bead feels tight. Never force the tool against the rim tape. After removing one side, inspect the tube for glass, wire, or pinched rubber. Industry tire-testing guidance commonly recommends matching inflation pressure to the tire’s marked range, not guessing by touch. Refit the tube with a small amount of air inside. This reduces folding and pinching. I once rushed this step and created a second puncture. The mistake was small, but avoidable. Inflate gradually, check that the bead sits evenly, and spin the wheel before riding. A final brake and axle check takes seconds.
A reliable multi-tool tire lever should support quick repairs without damaging the rim or inner tube. In my workshop, I inspect each lever before riding. Hairline cracks, sharp edges, or a bent hook can turn a simple puncture into a larger problem. Clean road grit from the lever after every repair, especially around its locking mechanism.
Maintenance is simple but easy to neglect. Wash the tool with mild soap, then dry it completely before storage. Do not leave it inside a wet saddle bag. Moisture can cause metal parts to corrode and may weaken plastic components over time. Keep the lever beside a spare tube, patch kit, and compact pump. That arrangement saves time during roadside repairs. I once stored one loose with keys, and the hook became scratched. It still worked, but not perfectly.
Tips: Test the lever at home with your actual rim and tire combination. Use steady pressure, not sudden force. Replace it when the hook slips, the body flexes excessively, or visible cracks appear. Check compatibility with carbon rims and tubeless tires before use. A tool that works well on one wheel may be unsuitable for another. Do not assume “multi-tool” means universal. My own early mistake was carrying only one lever; two levers usually make tight tires much easier to remove. Practice first. Roadside repairs are less forgiving.
It lifts a tire bead and supports small roadside adjustments. Some versions include hex keys, a spoke wrench, or a valve-core tool. It cannot solve every failure.
Look for rounded edges, a firm grip, and slight controlled flex. The lever should not collapse under pressure. Sharp plastic can scratch rims or pinch tubes.
Hex keys help with saddle or bottle-cage adjustments. A valve-core tool helps clean or tighten tubeless valves. A chain hook holds chain ends during temporary repairs.
No. A crowded tool can slow repairs beside a wet trail. I once chose too many functions and disliked the weak lever. Simple access often matters more.
Test it with your actual rim and tire combination. Practice removing a tight bead at home. Check the folding joint, markings, grip, and edges.
Move to a stable, visible place and deflate the tire completely. Insert the rounded end away from the valve. Lift a short section, then slide the lever around the rim.
Aggressive twisting can pinch the tube or damage the rim. Keep fingers clear. Refit the tube with a little air inside. I rushed this step once and caused another puncture.
Inspect the tube for glass, wire, or folded rubber. Inflate gradually within the tire’s marked pressure range. Check the bead, brake, axle, and wheel movement. Do not guess by touch.
A Multi-tool tire lever is a practical companion for cyclists who want to handle common roadside repairs with less equipment. By combining a tire lever with functions such as valve-core support, spoke assistance, hex keys, or chain-related tools, it can help remove and reinstall tires, adjust components, and address minor mechanical problems. When comparing options, consider durability, comfortable grip, compact size, tool variety, compatibility with your bike, and how easily each function can be accessed.
This guide reviews seven multi-tool tire levers and explains the situations where each type is most useful, from everyday flat repairs to longer touring and emergency maintenance. It also outlines safe techniques for loosening tire beads without damaging the tube or rim, along with advice on cleaning, drying, storing, and inspecting the tool. Replacing a lever is recommended when it becomes cracked, bent, or difficult to use.